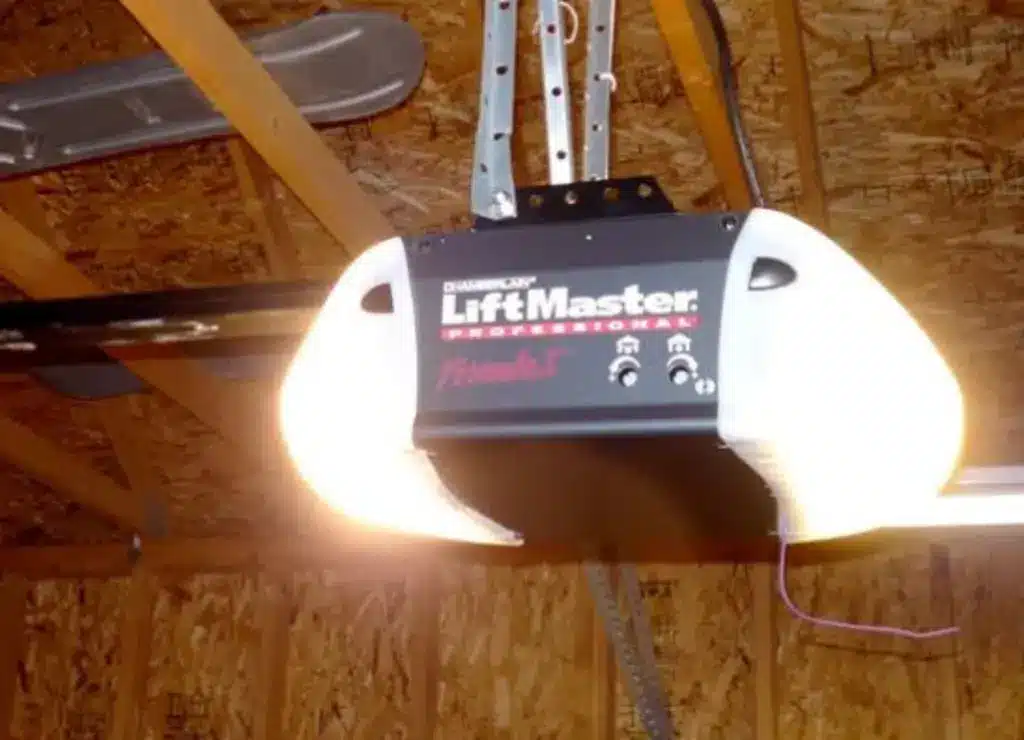
Adjusting a LiftMaster garage door opener is easy when you follow the proper steps. Start by unplugging the opener for safety. Locate the travel adjustment screws. Turn clockwise to let the door open or close farther. Turn counterclockwise to shorten the movement. Always test the door after each adjustment.
Adjust the force settings slightly if your door still reverses, struggles to move, or makes strange sounds. This controls how much power the opener uses. If the issue continues or feels too hard to handle, it’s best to call a garage door repair expert to avoid damage or injury.
How to Understand Your LiftMaster Garage Door Opener
Before adjusting, it’s good to know how the LiftMaster opener works. It uses a motor to move your garage door up and down on a track. It also has safety sensors and settings to keep everything working safely.
If your door doesn’t close or goes back up on its own, the settings might need to be fixed. Adjusting a LiftMaster garage door opener can solve these problems and help your door work better.
Making these changes is more than just fixing a problem. It helps your garage door last longer and work smoothly. Regularly checking and adjusting the opener keeps your door safe and easy to use.
Signs Your LiftMaster Opener Needs Adjustment
Your LiftMaster garage door opener might need an adjustment if it starts acting differently or sounds strange. These are the top signs you should look out for:
1. Door Won’t Close or Opens Too Much
The travel settings might be wrong if your garage door doesn’t close fully or opens higher than it should. These settings decide how far the door opens and closes. Adjusting them can help the door stop at the right spot and work properly.
2. Door Goes Back Up Too Soon
The closing force setting may be too low if the door starts closing but suddenly opens again before reaching the ground. The opener thinks something’s in the way. Turn the close force screw a little to help the door get the floor without reversing.
3. Door Feels Heavy or Too Easy
If the garage door feels too heavy or too light, the springs might need adjusting. Springs help the door stay balanced. If they’re too tight or too loose, the opener struggles. Adjusting or checking the springs can fix how the door feels.
4. Door Moves Too Fast or Too Slow
A door that moves too quickly can be unsafe, and one that’s too slow may not close well. This usually means the force settings are off. Minor changes to the force settings can help the door move at the right speed and stay safe.
5. Loud or Weird Sounds
Something may be off if your opener makes strange noises like grinding or straining. Parts might be loose or under too much stress. These sounds are a sign that it needs a quick check. Fixing it early can stop bigger problems and help it run quietly.

How to Adjust Travel Limits on Your Garage Door Opener
These limits decide how much the door opens or shuts. This is where to start if the door stops mid-way or doesn’t touch the floor.
Step 1: Locate the Adjustment Dials
Most LiftMaster garage door openers made after 2010 have two adjustment dials on the side or back of the opener unit. These dials are usually labeled “Up” and “Down” or sometimes “Travel.” They control how far your door opens and closes.
Step 2: Adjusting the Close Limit
If your garage door doesn’t close, find the “Down” or “Close” dial and turn it clockwise. This makes the door go farther down when closing. Press the wall button to test it, and keep adjusting until the door closes fully and stays shut.
Step 3: Adjusting the Open Limit
If your garage door doesn’t open fully, look for the “Up” or “Open” dial. Turn it to the right to raise the door higher. After each slight turn, test the door, and repeat the process until it opens completely without stopping too early.
How to Calibrate Force Settings on a Garage Door Opener
The force setting determines how much power the opener uses to open or close the door. If the force is too low, the opener might stop or reverse prematurely. If it’s too high, the opener may not reverse properly when something is in its path, a serious safety hazard.
Find the Force Screws
Check by the travel dials on your LiftMaster opener for two tiny screws. They are marked “Open Force” and “Close Force.” These control how strongly the opener pushes or pulls the garage door when opening or closing.
Adjust the Force
If the garage door stops before it’s fully open or closed and nothing is blocking it, try turning the right screw a little bit clockwise. Don’t turn too much at once. Make small changes and check the door each time to see if it works better.
Check Door Movement
After each slight turn, press the wall button to open and close the door. Watch how it moves. If it shuts too hard or doesn’t open smoothly, turn the screw the other way a little. Keep making small changes until the door opens and closes safely.
How to Align and Test Garage Door Safety Sensors
LiftMaster openers include infrared safety sensors that detect objects in the door’s path. Sensor misalignment could be the culprit if your door refuses to close or reverses for no reason.
- Check near the bottom of the garage door rails for the sensors.
- Both sensor lights should be solid (usually green or amber).
- If one light blinks, gently adjust the sensor until both lights are steady.
- Clean the lenses using a soft cloth; dust can interfere with function.
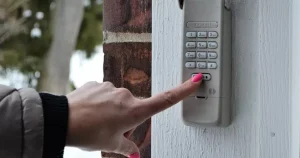
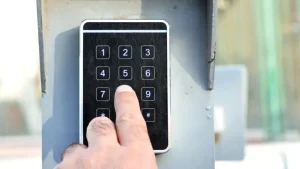
Easy Steps to Reprogram a Garage Door Opener
In some cases, especially after a power outage or failed operation, the LiftMaster opener may require a reset or reprogramming. This can also help refresh the settings after making adjustments.
Press and Hold the Learn Button
Look for the “Learn” button on the back of your LiftMaster opener. Press and hold it until the small light turns off. This clears all saved remotes and keypads, which is important if you’re resetting your opener or fixing problems with the remote.
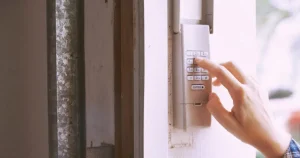
Re-sync Your Remote and Keypad
After clearing the memory, press the “Learn” button again until the light comes on. Next, press the button on your remote or keypad. If the light blinks, it means the remote is now connected. This step links your device back to the opener.
Retest Door Functions
Use your remote to open and close the garage door. Try it a few times to make sure everything works. This helps confirm your remote and opener are talking to each other. Always test things after adjusting your LiftMaster garage door opener settings.

Signs It’s Time to Call a Garage Door Expert
DIY garage door opener adjustments can solve many issues, but some problems go beyond basic calibration:
- Strange grinding noises inside the opener.
- The door comes off the track during operation.
- Broken or frayed cables.
- A faulty motherboard or circuit board inside the opener.
Easy Garage Door Care to Avoid Problems
Once your LiftMaster opener is correctly adjusted, routine maintenance can help keep it that way.
- Apply lubricant to hinges, rollers, and tracks twice a year.
- Check the alignment of tracks and safety sensors monthly.
- Test travel and force limits every 3-4 months, especially in areas with temperature fluctuations.
- Clean the opener’s housing and sensor lenses regularly.
Frequently Asked Questions
How do you adjust a lift-up garage door?
Check the springs and hardware when adjusting a lift-up garage door. The spring might need tightening if it opens too fast or feels heavy. Use the right tools and be careful. If you’re unsure what to do, call a garage door repair expert.
How do you set the garage door opener LiftMaster?
To set your LiftMaster opener, press the “learn” button on the opener until a light turns on. Then press the button on your remote. When the light blinks, it means it’s ready. Use the remote to check if the door is working right.
How do you adjust lift-off hinges?
To adjust lift-off hinges, lift the door off and check if the hinges are straight. If needed, move or change them a little. Once they line up right, place the door back. Make sure it opens and closes smoothly.
How do you adjust door hinges to raise a door?
To raise a door, tighten the screws on the top hinge or use longer screws. You can also slide a thin piece of cardboard behind the bottom hinge. This will lift the door enough not to drag or scrape the floor.
How do you adjust lift-off distance?
To fix the lift-off distance, add or remove small pieces near the hinges, like washers or spacers. Make small changes, then test if the part moves smoothly. This helps ensure the door or part lifts correctly without getting stuck.
Check the springs and hardware when adjusting a lift-up garage door. The spring might need tightening if it opens too fast or feels heavy. Use the right tools and be careful. If you’re unsure what to do, call a garage door repair expert.
To set your LiftMaster opener, press the “learn” button on the opener until a light turns on. Then press the button on your remote. When the light blinks, it means it’s ready. Use the remote to check if the door is working right.
To adjust lift-off hinges, lift the door off and check if the hinges are straight. If needed, move or change them a little. Once they line up right, place the door back. Make sure it opens and closes smoothly.
To raise a door, tighten the screws on the top hinge or use longer screws. You can also slide a thin piece of cardboard behind the bottom hinge. This will lift the door enough not to drag or scrape the floor.
To fix the lift-off distance, add or remove small pieces near the hinges, like washers or spacers. Make small changes, then test if the part moves smoothly. This helps ensure the door or part lifts correctly without getting stuck.
Conclusion
Fixing minor problems with your garage door can be simple when you know what to do. Adjusting a LiftMaster garage door opener helps your door move smoothly up and down. Carefully follow each step and check the door after each adjustment.
If your door still stops, moves slowly, or makes loud noises, don’t keep trying to fix it on your own. It’s safer to ask for help. Calling for garage door repair services can prevent more damage and ensure everything works as it should.
For safe and fast help, call Aloha Garage Doors at 603-930-3762. Our team knows how to handle everything, from fixing parts to adjusting a LiftMaster garage door opener. We’re here to make your garage door work like new again. Let us help today.
End Note
If you need expert garage door help, Aloha Garage Doors is ready to serve. Visit our website to explore complete residential services that simplify repairs, replacements, and upgrades. We deliver quality results that keep your garage door safe, smooth, and looking great.
We provide trusted support and reliable parts if you adjust a LiftMaster garage door opener. Our team installs strong garage door openers and works with brands like LiftMaster and CHI Overhead Doors. Use our Build Your Door tool, and check out our gallery and blog for tips and ideas.
Learn more about us and view our work in Candia, New Hampshire, and our full-service area. We’re here to simplify every garage door job with friendly service and expert care from start to finish.