Getting a new garage door opener installed is one of those home projects that involves more steps than most homeowners expect. Going in without a clear picture of the process can lead to surprises that delay the job or affect the final result.
Whether you are replacing an old unit that finally gave out or upgrading to something with better features, knowing what the installation process involves helps you prepare, ask the right questions, and feel confident that the job is being done correctly. This guide walks through each stage of a garage door opener installation from start to finish.
Choosing the Right Opener Before Installation Begins
The installation process starts before anyone sets foot in your garage. Choosing the right garage door repair and opener solution for your specific door and household needs is the foundation of a successful install, and the drive type is one of the most important decisions you will make.
- Chain drive models are durable and cost-effective, but produce more noise during operation
- Belt drive openers run quietly and work well for garages attached to living spaces
- Screw drive openers have fewer moving parts and lower long-term maintenance needs
- Wall-mount openers are ideal for garages with limited ceiling clearance
- Each drive type performs differently depending on door weight and frequency of use
How Horsepower Rating Affects Installation Outcome
Choosing the wrong horsepower for your door puts unnecessary strain on the system from the very first cycle. Most standard single-car doors work well with a half-horsepower motor, while heavier or oversized doors may require three-quarter horsepower or more.
- Half-horsepower motors handle most standard single-car residential doors
- Three-quarter horsepower is recommended for heavy or oversized doors
- Undersized motors wear out faster and may struggle in cold weather conditions
- Oversized motors add unnecessary cost without improving everyday performance
- Always confirm horsepower requirements with your installer before purchasing
If you want to understand which brands offer the best combination of power and reliability, our guide on What Are Common Garage Door Opener Brands? breaks down the most trusted options on the market.
What a Professional Installation Actually Involves
A thorough technician will not simply mount a new opener and leave. The process begins with a full inspection of the existing door, tracks, springs, and rollers to confirm everything is in working order before the new garage door installation begins.
- The technician checks the door balance before mounting the new opener
- Track alignment is inspected for bends, rust, or misalignment issues
- The spring condition is assessed to confirm that the door is properly supported
- Roller wear is evaluated to ensure smooth and consistent door travel
- Any existing issues are flagged and addressed before installation proceeds
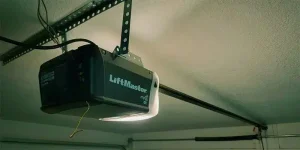
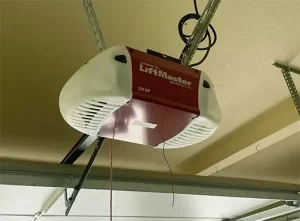
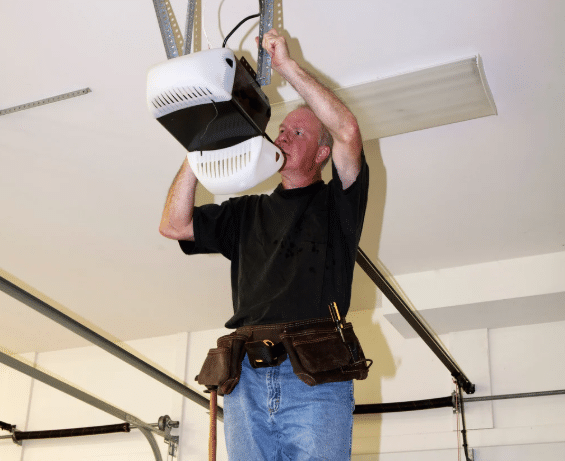
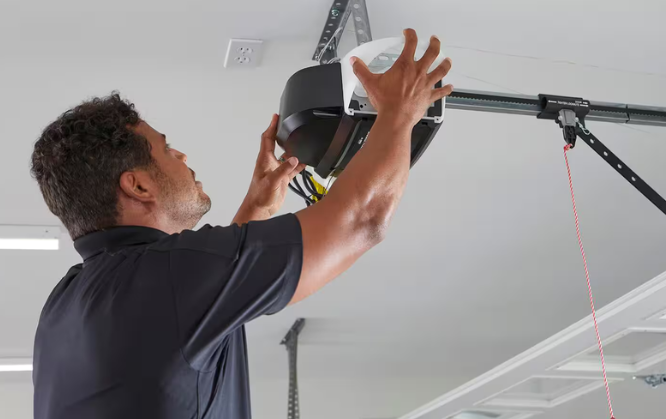
What the Mounting and Wiring Process Looks Like
Once the door is confirmed to be in good working order, the technician mounts the opener to the ceiling, installs the drive rail, and connects the trolley to the door. Safety sensors are mounted near the floor on both sides of the door opening and wired back to the unit. According to Family Handyman’s overview of garage door opener installation, proper calibration of travel limits and force adjustments is one of the most important steps in the entire process.
- Opener unit is secured to the ceiling with appropriate mounting hardware
- Drive rail is installed and connected to the trolley and door bracket
- Safety sensors are mounted at floor level on both sides of the opening
- All wiring is routed cleanly and secured to avoid interference with door travel
- Travel limits and force settings are calibrated before any safety testing begins
Safety Checks That Must Happen at Every Installation
Safety testing is not optional, and a responsible technician will run through a full series of checks before considering the job complete. The auto-reverse test is one of the most critical, confirming that the door stops and reverses immediately upon contact with an object in its path.
- A flat board is placed on the ground in the door’s closing path
- The door is triggered to close and must reverse on contact with the board
- If the door does not reverse, force settings require immediate adjustment
- The test must be passed before the installation is considered complete
- Homeowners should repeat this test monthly after installation
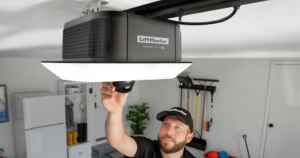
How Photo-Eye Sensor Alignment Is Verified
The photo-eye sensors project an invisible beam across the bottom of the door opening, and if anything breaks that beam while the door is closing, the door must stop and reverse before making contact with the obstruction. According to DASMA’s garage door opener safety guidelines, proper sensor alignment and testing are fundamental requirements for every garage door opener installation.
- Both sensors must be mounted at the same height on either side of the opening
- Sensor indicator lights must be steady, not blinking, to confirm proper alignment
- The beam is tested by passing an object through it while the door is closing
- Misaligned sensors cause the door to reverse without an obvious obstruction
- Sensor lenses should be wiped clean as part of the installation sign-off process
How to Prepare Your Garage Before the Technician Arrives
A little preparation on your end keeps the installation on schedule and reduces the chance of delays. Clearing the garage of clutter near the door and along the ceiling track path gives the technician the space needed to work efficiently.
- Remove items stored near the door opening and along the ceiling track path
- Note any existing performance issues with the current door to share upfront
- Confirm there is a working electrical outlet near the planned opener location
- Make sure the garage ceiling is accessible and free of hanging obstructions
- Write down any questions about features or operation to ask during the visit
Why Confirming the Electrical Setup Matters Before Installation Day
Garage door openers require a standard electrical outlet near the ceiling mounting point, and if yours does not have one, an electrician will need to add it before installation can proceed. Confirming this ahead of time avoids a situation where the technician arrives and cannot complete the job.
- Standard openers require a grounded 120-volt outlet near the mounting location
- Outlet placement should be within reach of the opener’s power cord
- Extension cords are not an acceptable long-term solution for powering an opener
- If no outlet exists, scheduling an electrician before the opener appointment is essential
- Confirming power availability ahead of time prevents same-day delays
Common Issues That Surface During Installation
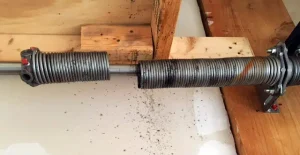
Even with good preparation, some installations reveal issues that were not visible beforehand. An out-of-balance door is one of the most common complications, and if the springs are worn or improperly tensioned, the opener will not function correctly no matter how well it is installed.
- Out-of-balance doors require spring adjustment before the opener can be set up properly
- Damaged or misaligned tracks must be corrected before installation continues
- Worn rollers create uneven door travel that affects opener calibration
- Old or frayed wiring in the garage may need updating as part of the process
- A thorough technician communicates all issues clearly before proceeding
What Happens When Existing Hardware Cannot Be Reused
In some cases, the existing mounting hardware, drive rail, or sensor brackets cannot be reused with the new opener. This is not always predictable ahead of time, but a good technician will explain clearly what can and cannot carry over and why before moving forward.
- Incompatible mounting hardware requires new brackets specific to the new model
- Old drive rails may not align correctly with the new opener unit
- Sensor brackets from older systems are often not compatible with current models
- Reusing incompatible hardware compromises both function and safety
- All hardware decisions should be explained and approved before the work continues
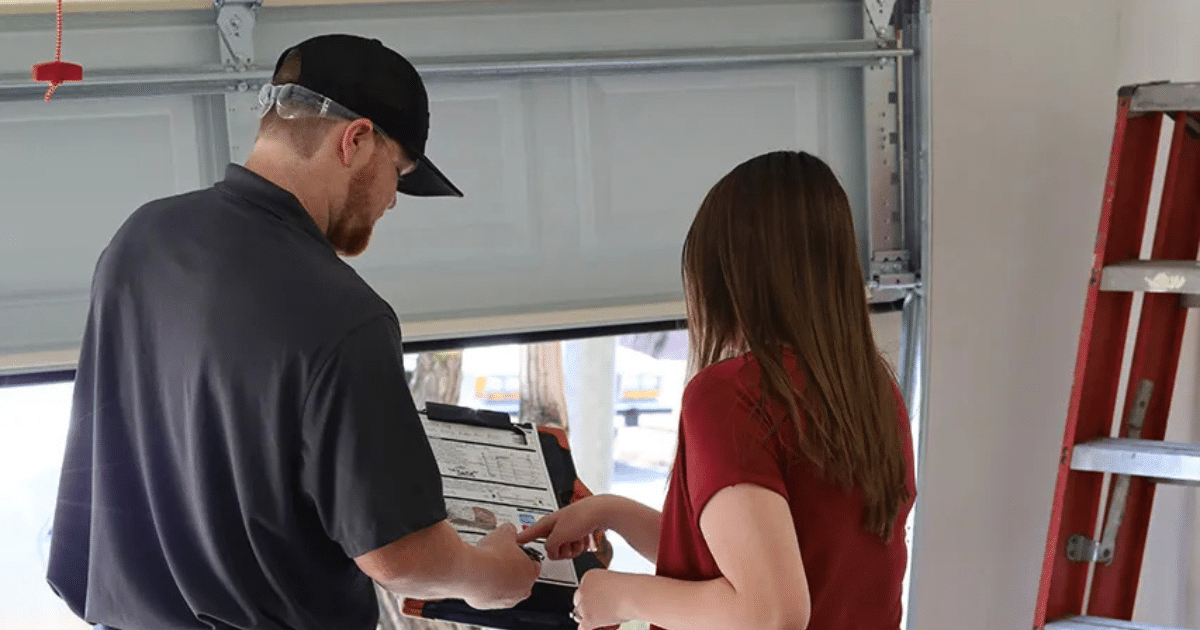
What to Confirm Before the Technician Leaves
Before the technician wraps up, there are several things worth confirming on your end. Making sure you understand how to use the manual release cord, how to program additional remotes, and how to operate the smart app if included are all practical steps that take only a few minutes.
- Confirm the manual release cord location and practice using it at least once
- Verify all remotes and keypads are programmed and responding correctly
- Ask about adding additional remotes or keypads in the future if needed
- Request a walkthrough of the smart app setup if the opener includes connectivity
- Confirm what maintenance the technician recommends and how often
How Ongoing Maintenance Protects Your New Investment
A new opener performs best when it receives consistent attention after installation. Asking your technician what maintenance schedule they recommend and following through on it is the best way to protect the investment you just made.
- Lubricate door components including hinges, rollers, and tracks once or twice per year
- Test the auto-reverse mechanism monthly to confirm it is still calibrated correctly
- Schedule a professional inspection once per year to catch early signs of wear
- Keep the tracks clear of dirt and debris that creates resistance during operation
- Address any new sounds or performance changes promptly before they worsen
To get a full picture of what affects how long an opener lasts and what you can do to extend its life, our guide on How Long Does a Garage Door Opener Last? covers all the key factors in detail.
Understanding the Safety Standards Behind Every Installation
Garage door opener safety standards have evolved significantly over the decades, and every installation today is expected to meet requirements that were not always in place. Understanding what those standards cover helps you know what to expect from a properly completed installation.
- Auto-reverse requirements became federal law in the United States in 1993
- Photo-eye sensors have been required on all new openers since 1993
- Rolling code security is standard on all current residential opener models
- Manual release mechanisms are required on every residential opener sold today
- Installations that skip any of these steps do not meet current safety expectations
What to Do If Your Opener Does Not Meet Current Safety Standards
If your existing opener predates current safety requirements or was installed without proper testing, upgrading is not just about getting newer features.
- Openers installed before 1993 may lack auto-reverse and photo-eye sensor requirements
- Missing safety features put household members and pets at risk during door operation
- A professional inspection can confirm whether your current opener meets current standards
- Upgrading an outdated opener improves both safety and everyday convenience
- Never assume a working opener is a safe opener without verifying its safety features
For a complete breakdown of what safety standards every homeowner should know and how to verify your opener meets them, our guide on Garage Door Opener Safety Tips Every Homeowner Must Know covers everything in detail.
A Smooth Installation Starts with the Right Team
Knowing what to expect from a garage door opener installation takes the guesswork out of the process and helps you feel confident that every step is being done correctly. From drive type selection to final safety checks, each part of the process matters.
If you are in Kingston, NH and ready to have a new garage door opener installed, Aloha Garage Doors is here to make the process straightforward from start to finish. Our team handles everything from equipment selection to final calibration so you can feel confident in the result. Contact us or give us a call today to get started.